Contents
Setting Up a GitLab CI Pipeline
If you don’t know what a pipeline is supposed to do, check out this. For following along, make sure, that you have followed the setup steps until here. If you don’t want to follow along, you can still understand how a pipeline works.
In the Motivation Section we laid out some tasks we want our pipeline to perform. The stages of our pipeline will be the following:
- Build Stage: We will build the docker image defined in our
Dockerfileand push it to the GitLab Registry. - Release Stage: We tag the image build in stage 1 with
:latest. In theory, this step is not necessary, we could have just tagged the image in the previous step. If we had a staging server, we could tag a staging image here. - Deploy Stage: All actions in the deployment stage, must be triggered manually. We allow for multiple actions in the Deploy Stage.:
- Deploy the
:latestimage, to the connected Kubernetes cluster. - Reset the Postgres database using the oTree command
otree resetdb. - Remove the whole project (i.e. all its resources) from the Kubernetes cluster.
- Deploy the
GitLab CI Pipeline is defined in the gitlab-ci.yaml. As soon as such a file is present in the GitLab repository, the pipeline can be viewed under CI/CD > Pipelines. To run a pipeline, you need to have at GitLab Runner installed. Make sure to only use runners running in your cluster, otherwise the pipeline won’t run.
Dissecting the Pipeline
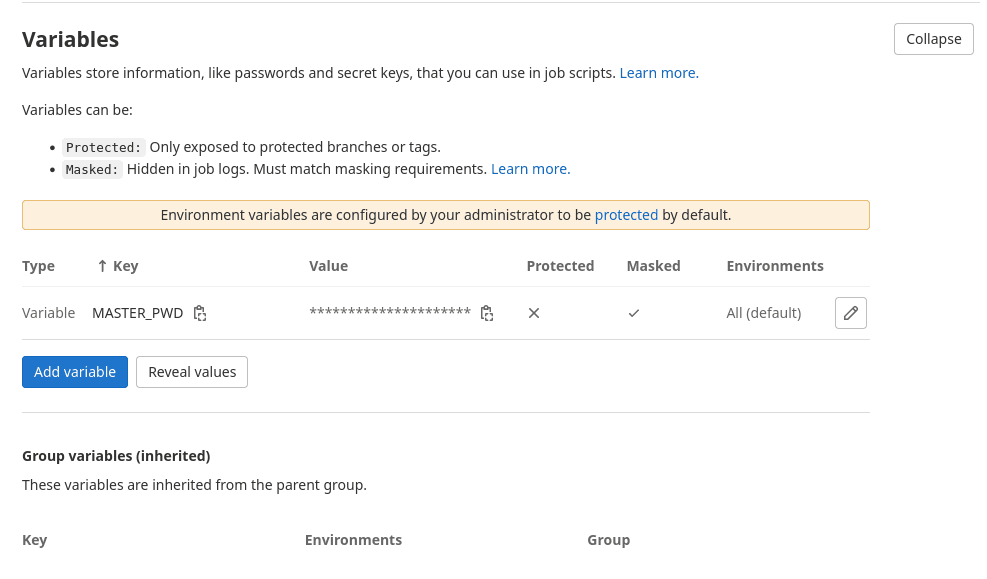
Next, we will take a closer look at the pipeline. You will notice, that we use some env variables. Most of them are available by default, we still have to add MASTER_PWD and set a password. This will be later used to access the database and the admin panel.
See comments below, to understand what eacg commands does.
stages:
  - build
  # if you want a test stage add it here
  - release
  - deploy

variables:
  # Define variables for image tagging
  CONTAINER_TEST_IMAGE: $CI_REGISTRY_IMAGE:$CI_COMMIT_REF_SLUG
  CONTAINER_RELEASE_IMAGE: $CI_REGISTRY_IMAGE:latest
  # This instructs Docker not to start over TLS.
  DOCKER_HOST: tcp://localhost:2375
  DOCKER_DRIVER: overlay2
  DOCKER_TLS_CERTDIR: ""

build:
  stage: build
  # uncomment next line for manual build stage
  # when: manual
  # it is required to use a specific docker version
  image: docker:19.03.12
  services:
  # to build docker images in a docker container you need to run
  # dind (docker in docker)
    - docker:19.03.12-dind
  script:
    # login to gitlab registry
    - echo $CI_REGISTRY_PASSWORD | docker login -u $CI_REGISTRY_USER $CI_REGISTRY --password-stdin
    # build container
    - docker build -t $CONTAINER_TEST_IMAGE .
    # push container to gitlab registry
    - docker push $CONTAINER_TEST_IMAGE

release:
  image: docker:19.03.12
  services:
    - docker:19.03.12-dind
  stage: release
  needs: ["build"]
  script:
    # login to gitlab registry
    - echo $CI_REGISTRY_PASSWORD | docker login -u $CI_REGISTRY_USER $CI_REGISTRY --password-stdin
    # pull, add tag to img and push to registry again
    - docker pull $CONTAINER_TEST_IMAGE
    - docker tag $CONTAINER_TEST_IMAGE $CONTAINER_RELEASE_IMAGE
    - docker push $CONTAINER_RELEASE_IMAGE

DEPLOY:
  image:
    # use kubectl image to have access to kubectl command
    name: bitnami/kubectl:latest
    entrypoint: [""]
  stage: deploy
  # needs: ["build", "release"]
  # Optional: Manual gate
  when: manual
  script:
    # add env variable to inject postgres url with password
    - export database_url=postgres://postgres:$MASTER_PWD@postgres-service:5432/django_db
    - echo " $CI_PROJECT_NAME-" >> zz_kustomize/kustomization.yaml
    # apply and rollout new update
    - kubectl apply -k zz_kustomize
    - kubectl rollout restart deploy/$CI_PROJECT_NAME-otreedemo

RESET-DB-OTREE:
  image:
    name: bitnami/kubectl:latest
    entrypoint: [""]
  stage: deploy
  # needs: ["build", "release"]
  # Optional: Manual gate
  when: manual
  script:
    # exec into otree pod and run resetdb command from script
    - kubectl exec deploy/$CI_PROJECT_NAME-otreedemo -- bash .resetdb.sh

DELETE-DEPLOYMENT:
  image:
    name: bitnami/kubectl:latest
    entrypoint: [""]
  stage: deploy
  # Optional: Manual gate
  when: manual
  script:
    # create same environment as deployment
    - export database_url=postgres://postgres:$MASTER_PWD@postgres-service:5432/django_db
    - echo " $CI_PROJECT_NAME-" >> zz_kustomize/kustomization.yaml
    # delete project by deleting kustomize
    - kubectl delete -k zz_kustomize
What next?
Now wait for your pipeline to run. After it is done, you can view your project in the browser. Congratulations, this concludes the oForest set up. You now can easily deploy any experiments to your cluster.
Designed & Developed by Jasper Anders

